
In this article, we’ve got all the information you need to decide on the optimal kayak size. Discuss kayak sizes like a pro!
This is my guide to storing your kayak in a garage. I’ll talk about the best ways to hang or put away kayaks safely and efficiently.
Contents
show
Below, I’ll walk you through everything you need to know about storing kayaks in your garage—from how to avoid damaging your kayak to the best garage kayak storage solutions to advice on how to clean and protect it all winter long.
By the end of this post, you’ll know exactly what you need to do to make certain your kayak is well-cared for over years of storing it in your garage.
Best Garage Kayak Storage Solutions
Without further ado, let’s talk about a few of the best ways you can store your kayak.
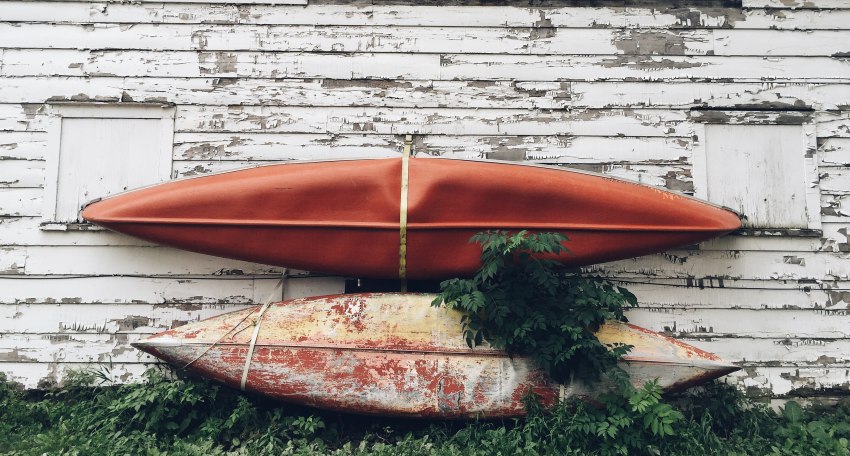
Wall Mounts
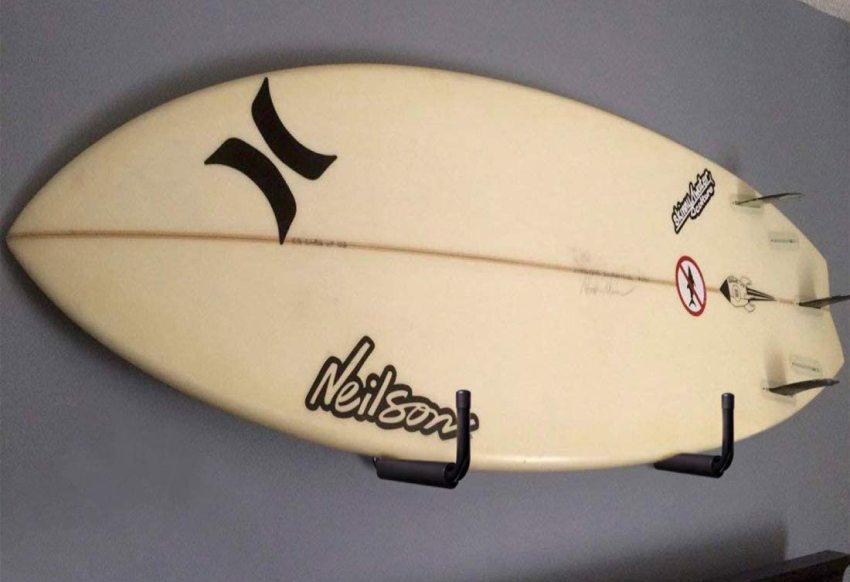
Wall mounts are some of the most common garage kayak storage solutions. They are sturdy and they tend to be inexpensive and fairly easy to mount.
There are a number of different options for wall-mounting a kayak:
Wall Racks
Racks are, simply put, metal arms that are mounted directly to the wall of your garage to serve as a cradle/resting place for your kayak.
The “pros” of wall racks are:
- They’re incredibly sturdy because they’re made out of metal;
- They’re anchored directly to your wall studs;
- They typically feature a kayak-friendly design and padding that will protect the kayak’s hull from being damaged.
Some racks are foldable, so you can fold them up and out of the way when you’re using the kayak (to save space in your garage). Most wall racks, however, are simply fixed designs.
The only big “con” of these wall-mounted racks is that you are drilling into the studs using thick screws/bolts, so there will be visible damage to your wall.
In my Best Kayak Storage Racks article, I reviewed four excellent (and affordable) kayak wall mounts that may work for your garage.
Loop Straps
Loop straps are a beautifully inexpensive kayak storage solution for your garage. Simply put, they are straps that loop around your kayak and hang from eye-bolts or hooks that you anchor into the wall studs.
Typically, you can find loop straps for as cheap as $15 to $30—for example, this set of GOSWIFT Kayak Storage Straps.
However, I’ve found that these straps are best-suited to the standard “budget” recreational kayak. They are not sturdy enough for heavier fishing kayaks, expedition kayaks, or sea kayaks.
You see, many of these straps use the cam buckle system, where the buckles have “teeth” that keep the strap from sliding loose. However, over time, the weight of a heavy kayak will inevitably pull on the buckle, loosening it until it gives way.
Also, the “lightweight” systems are also designed for lighter-weight kayaks, but can’t handle a lot of weight.
In my case, the loop strap system I bought used a plastic side-release buckle that is great for quick mounting and unmounting. It was inexpensive and great for my Pelican Summit 100X (super lightweight recreational kayak) but couldn’t handle the weight of my 12’ foot Azul Riot.
I had to DIY my own sling in order to mount the heavier kayak to my wall.
DIY Kayak Slings
A DIY sling is actually incredibly easy to make! All you need is a good set of ratchet straps or cam buckle straps.
These straps are designed for supporting A LOT of weight, or strapping hundreds of pounds to the roof of your car.
The cam buckle or ratcheting systems are more than tough enough to bear up under the weight of your kayak, and there’s no way they’ll sag or slip.
You’ll still need some sort of heavy-duty eye-bolt or hook to anchor into the wall, but then you can just wrap the ratchet/cam buckle straps around your kayak and hook the ends onto the anchor point.
With just $20 or so and 15 minutes, you’ve got your own DIY sling!
Ceiling Storage for Kayaks
If your garage doesn’t have a lot of wall space you can use—for example, you’ve got tires, tools, or other storage items already hanging on the walls—don’t despair. There is always more space overhead.
The standard garage height is 8 to 12 feet, which should be more than tall enough to give you some storage room on the ceiling.
There are a couple of different solutions you can use to mount your kayaks to the garage ceiling:
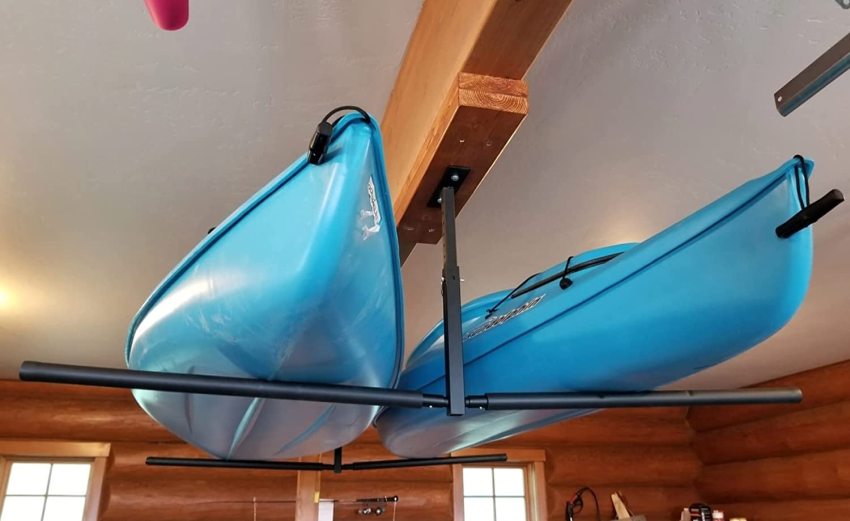
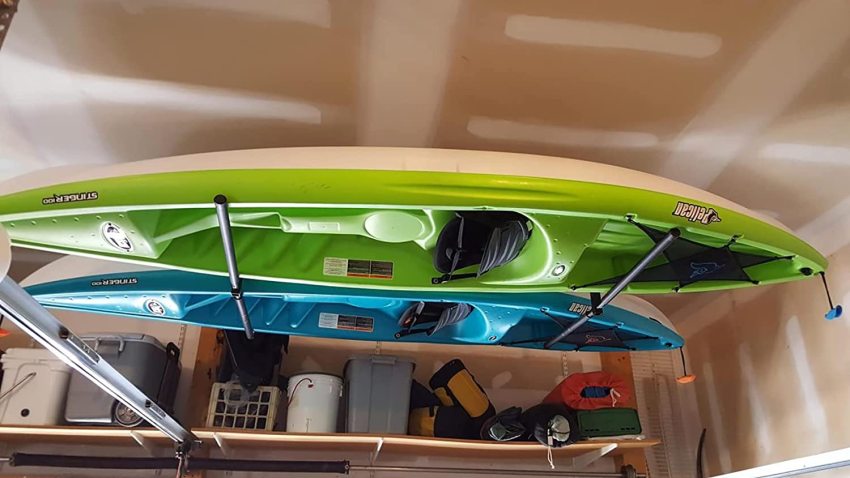
Ceiling Racks
A ceiling rack is exactly as simple as it sounds: a rack that’s anchored to the ceiling instead of the wall. Typically, it will have space for 1 or 2 kayaks (depending on the model) and feature a simple design with crossbars to support the kayak/s and vertical bars to anchor it to the ceiling.
These racks are definitely the simplest and most affordable ceiling-mounting solution. All you need is a ladder tall enough to reach the ceiling and a stud finder to locate the ceiling studs, and you’ve got a great place to mount your kayak.
However, there are a couple of “cons” you need to be aware of.
First, if your garage ceiling isn’t flat (but slanted to match the roof’s slant), you may not be able to use a ceiling rack because the angle will cause the kayak to slide off the rack.
Also, you’ll need to be tall enough (or comfortable enough to climb a step ladder while hoisting a kayak over your head) to put the kayak up on the ceiling rack.
But if you only plan to take it down/put it up once a year, it may be a great, cheap way to store the kayak out of your way.
My Best Kayak Storage Racks article reviews a dual-kayak ceiling rack that should serve your needs perfectly.
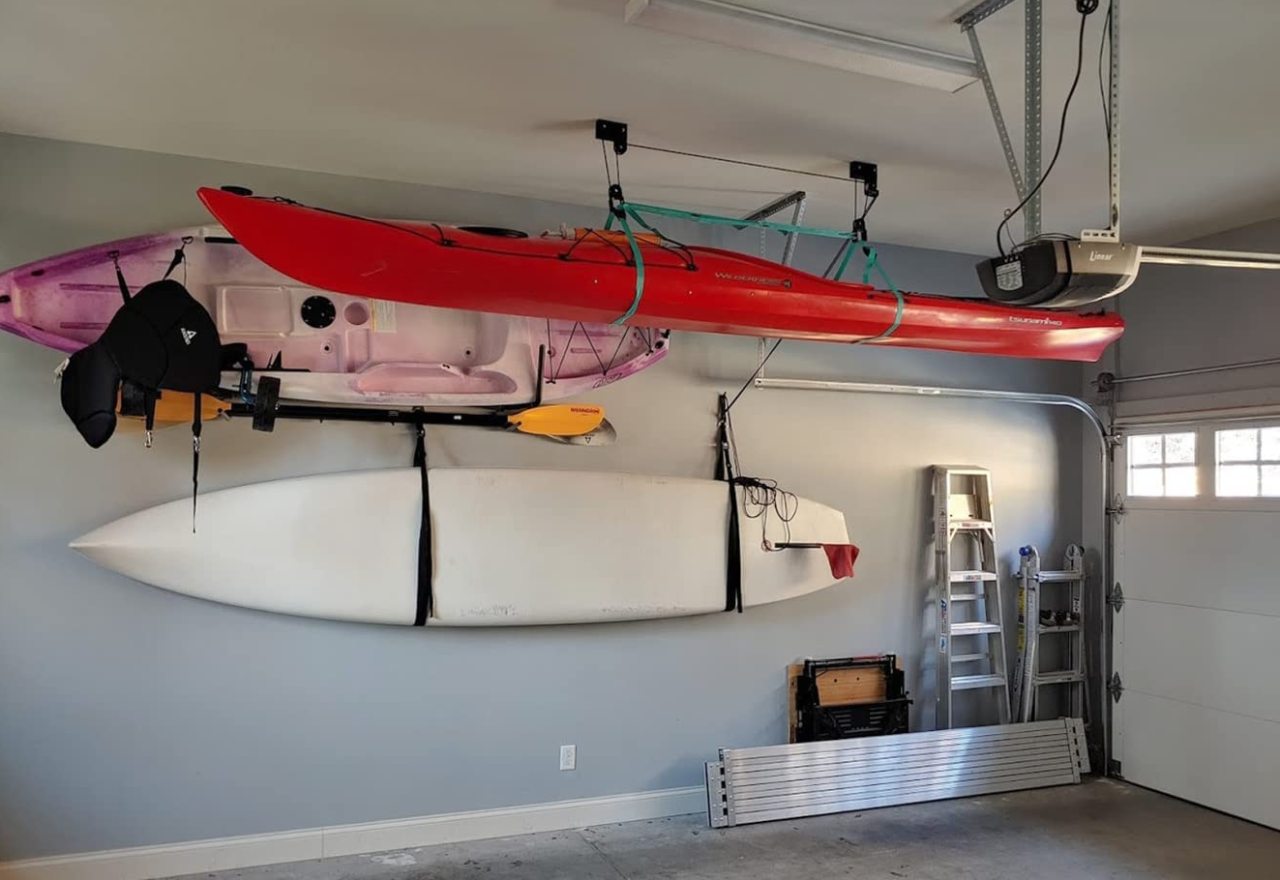
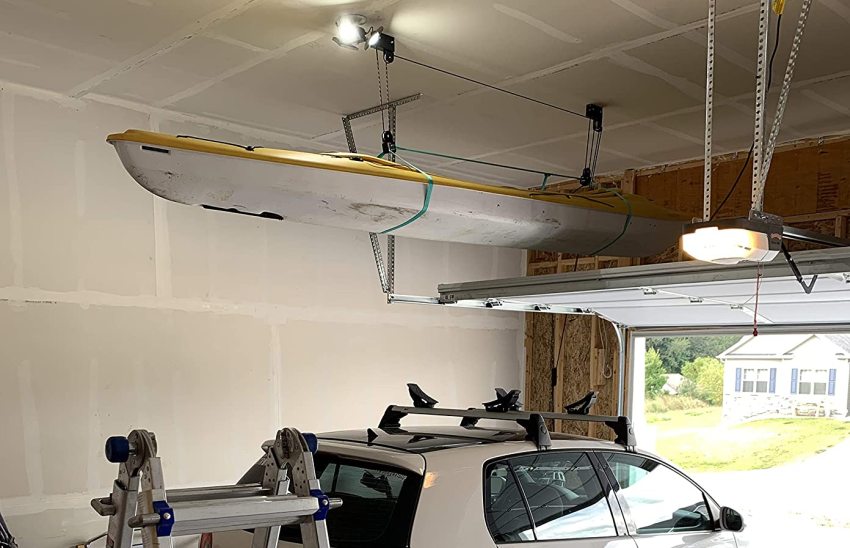
Kayak Hoists
Kayak hoists are more complex but a far more versatile storage solution.
Basically, two slings/loops are connected to a rope and pulley system that allows you to lower the straps to the garage floor to easily insert/remove the kayak, then pull on the rope to hoist it up to the ceiling.
From there, you simply tie it down to an anchor point, and your kayak is stored out of the way but ready for easy access whenever you want to use it.
This is a good option for anyone who wants to frequently access their kayak throughout the summer but needs to store it out of the way on a regular basis. The hoist systems make it easy to raise and lower the kayak from the ceiling.
However, be aware that hoists are pricier, more prone to malfunction, and do require a bit of learning to get right.
Plus, you’re going to have two ropes running from the pulley to an anchor point, which could be annoying if you’re trying to drive/move around in your garage.
I did a whole article on the Best Kayak Hoists, and shared great options—even one that uses an electric motor to do the heavy lifting for you!
Freestanding Kayak Racks
A freestanding kayak rack is definitely the simplest—and sturdiest—choice for anyone who wants to store their kayaks in their garage. They typically feature solidly built, well-padded racks designed specifically to protect your kayak, and tend to be very stable (on a level surface).
There’s just one problem: they take up a lot of space.
That’s right: in addition to the kayaks themselves occupying space, the rack will also require a lot of space, especially for the oversized legs needed to keep the rack balanced under the weight of the heavy, large kayaks.
If you’ve got a two-car garage (or larger) and only have one car to park inside, that may not be a problem. Or, if you park your cars outdoors all winter long and use the garage for storage, a workshop, or your gym, you may be able to find the space for a freestanding kayak rack.
People who drive compact cars (like a MINI Cooper or a VW Golf) will also likely have enough space to fit a rack.
However, for smaller homes (or townhouses) with garages sized just big enough for 1 or 2 cars, a freestanding kayak rack may be too big to fit.
My Best Kayak Storage Rack article has three options of sturdy, reliable freestanding kayak racks you may want to consider.
Portable/Collapsible Kayak Stands
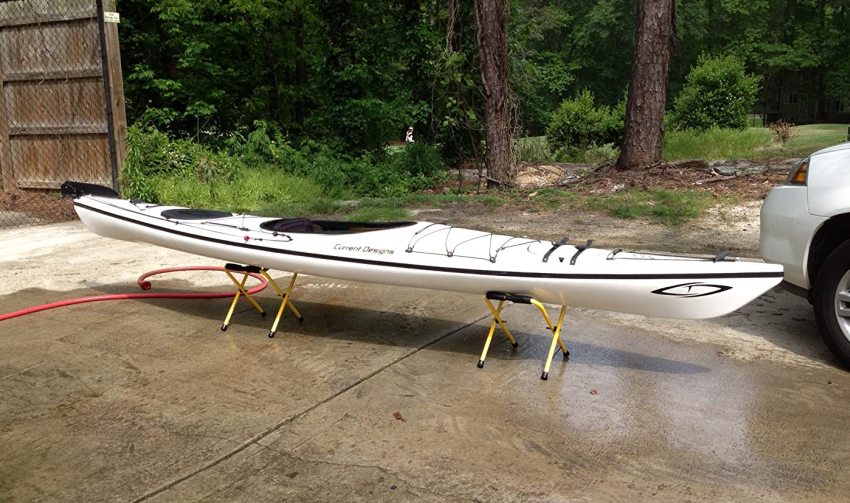
Another “freestanding” option to consider is a portable (or collapsible) kayak stand. This is a much more compact option, one that will take up far less space in your garage when not in use, and can actually be packed to carry around with you to use when on the go.
Kayak stands are usually made from metal, and designed to fold up small (like a folding chair) enough to fit in any corner of your garage or the trunk of your car.
They’re easily adaptable to match the length of your kayak—great for anything from a 6-foot kids kayak to a 16-foot racing kayak—and tend to be very lightweight.
When not in use, you can fold them down small, then unfold them when the time comes to store the kayak.
They’re definitely more compact than a freestanding rack, though they’re not as sturdy, stable, or secure. It’s sadly all too easy to bump the racks as you move around the garage, and if they shift, the kayak may fall off the cradle.
However, if you want a more compact and portable solution, these collapsible kayak stands are game-changing.
In my Best Kayak Storage Rack post, I review a great boat stand that will serve your needs beautifully.
Vertical Storage
I’m going to be upfront with you and say I DO NOT recommend upright storage for your kayak.
Storing the kayak on the tip of the stern or bow puts a lot of pressure on the end, and may damage the hull, causing the kayak to bend.
Then there’s the fact that not many garages are tall enough to store a kayak upright. As I mentioned above, most garages tend to be between 8 and 12 feet tall, with the “average” being around 10 feet (depending on building codes and the style of house).
Some kayaks—such as budget recreational kayaks, kids’ kayaks, and whitewater kayaks—will be short enough (under 10 feet) to store upright. But any longer fishing, touring, racing, or expedition kayak will likely be much too long.
That being said, if you’ve got no other option—you’re not comfortable storing the kayaks overhead, you don’t have room for a freestanding rack, and you don’t have enough space on your walls to mount the kayaks horizontally—it’s a good backup plan.
Be aware that you will likely have to DIY your own upright kayak storage solution. Typically, you can use ratchet/cam buckle straps connected to two anchor points on either side of the kayak to keep it standing upright. Just make sure to add plenty of padding/cushioning on the ground to protect your kayak from being damaged. And consider frequently rotating the kayak on end to avoid the “banana” effect or hull damage.
Inflatable/Collapsible Kayak
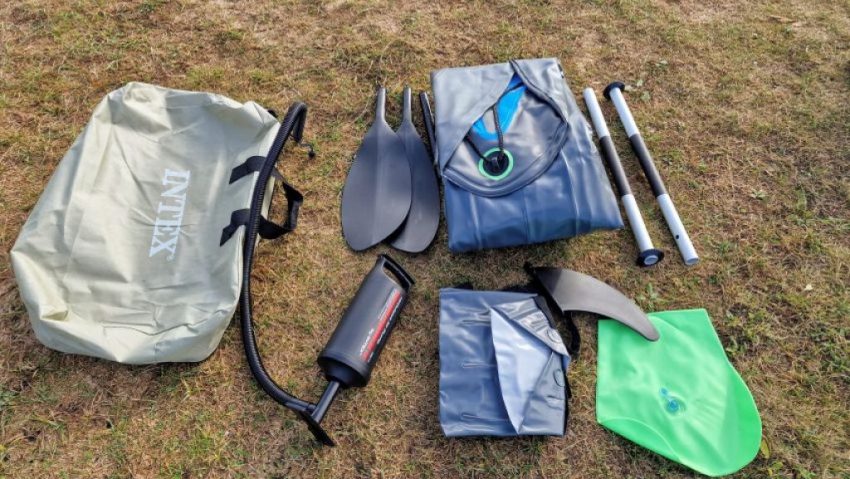
Last, but definitely not least, if you’re not sure how to store the kayaks in your already-full, space-limited garage, you may want to consider an inflatable or collapsible kayak.
Inflatable kayaks are a great option for recreational kayakers who want a portable, compact, space-saving kayak. They’re designed to fold down small enough (when deflated) to fit into an oversized backpack, which you can easily carry around, throw in the trunk of your car, or tuck into a corner of your garage.
While inflatable kayaks aren’t quite as tough, rugged, or versatile as hard-shell kayaks, they’re still a great choice for enjoying a relaxing paddle on calm, flat waters. Truth be told, they’re getting better and better with every year and every new upgrade of material and design, so the day isn’t far off when they may be nearly as good (in terms of handling and maneuverability) as the standard hard-shell kayaks.
My buddy Tom “Moose” Kilpatrick did an excellent round-up of the Best Inflatable Kayaks for 2022 worth checking out.
Another space-saving option, one I had a blast testing out personally this year, is a foldable kayak. ORU is the best-known brand that makes foldable kayaks, which are a truly fascinating concept: a sturdy, rigid shell designed with “seams” that allow you to fold it down small enough to fit into a suitcase-sized bag, but when unfolded, handles like a regular hard-shell kayak.
You can read my review of the ORU Bay ST, a foldable kayak designed to handle choppy waters and fast currents, and check out ORU’s other available models.
Both of these are good options if you have limited storage space and want a kayak that will fit without the need for mounts, racks, hoists, or any other hardware.
How Not to Store Your Kayak: Typical Mistakes
Here are some things NOT to do when storing your kayak:
Don’t store kayaks wet
Always make sure your kayak is clean and dry. Saltwater will deteriorate the kayak, and even freshwater helps to grow mold or bacteria that could damage the plastic.
Plus, if the kayak is wet, mildew may form, and that will not be easy to clean off. (See the “Before You Store It…” section for advice to help you prepare your kayak for storage.)
Don’t store kayaks on a hard surface
Never store your kayak directly on a hard metal or wooden rack (there should always be padding to protect the kayak), or on the ground. Thermoplastic and rotomolded kayaks in particular damage easily, but even fiberglass kayaks may deform over months spent sitting on the hard ground or other hard surfaces.
Don’t store kayaks in direct sunlight
Direct sunlight is guaranteed to deteriorate plastic kayaks, and can even damage fiberglass kayaks. The UV radiation in the sunlight will weaken the hull and make it more brittle and prone to damage.
If you’re storing the kayak outdoors or in a garage that you leave open and exposed to sunlight all winter long, make sure to cover it with a kayak cover or tarp that will shield it from the sun’s UV radiation.
Don’t store kayaks with the cockpit open
The open cockpit of your kayak makes the perfect home for little critters (like squirrels, chipmunks, rats, and rodents) as well as lizards, spiders, scorpions, snakes, and ants.
This may not seem like a big problem if your kayak is in a closed garage, but you’d be surprised what sort of creatures can find their way into your home and take up residence in your kayak.
To protect the plastic and foam inside the kayak from being damaged, it’s a good idea to cover the cockpit.
Don’t store kayaks with the hatches open
You want to leave the hatches open for a few days after first washing your kayak, as that will allow plenty of time for the interior to dry. But after a week or so has passed, make sure to close the hatches. This will not only prevent critters from making their homes there but also keep the humidity from causing moisture to build up inside the compartments.
Don’t hang kayaks by the handles
Any hardware that is attached to the kayak is going to be on the fragile side, meaning using it to mount/store the kayak (such as from loops or straps) risks tearing the hardware free and damaging the kayak.
Also, if you run straps or loops through the grab handles at the extreme ends of the kayak, the weight in the middle will pull downward, causing a “banana” effect that might seriously damage—and even render useless—your kayak.
How to Prepare a Kayak for Storage
Now that we’ve talked about how to store the kayaks, it’s important to talk about how to prepare the kayaks for storage. Spending an hour or two prepping the kayak for winter storage is well worth the time invested; the best way to protect your kayak from being damaged or deteriorating with regular use/long months of storage.
Here’s the step-by-step process to preparing your kayak for long-term storage (anything longer than a few weeks):
Step 1: Empty out the water
When you come back from the lake, river, or ocean for the last time, make sure to empty out as much water as possible.
Yes, I know you likely did that before loading the kayak onto the roof rack or trailer to transport it home, but on the off-chance you missed some water, give it another go.
Remove the scupper plugs and tip the kayak upright to let any water in the cockpit drain out. Then open the hatches and flip the kayak upside down (carefully) to empty out any water that may have gotten in.
Step 2: Take out seat cushions, paddles, and accessories
This may feel like an unnecessary hassle, but trust me, it’s worth it. Water will seep underneath the seat, carrying dirt, grit, and grime with it. The cushions of your seat may also get water-logged and will need to be cleaned, too.
Once the seat is removed, set it aside, along with the paddles and any other accessories you’ve taken with you. Those will need to be washed, too, in order to prevent their deterioration.
Step 3: Rinse it off
Rinse the kayak and all the accessories thoroughly with clean water (“clean” definitely includes your city’s local water supply). Really, what you want is to get rid of any traces of saltwater or lake/river water that could leave salt, grime, mold, bacteria, or other residue on your kayak.
Open all the hatches and compartments, too, and make sure to rinse their interior thoroughly.
Step 4: Give it a scrub-down
This is especially important if you’ve been using the kayak frequently in saltwater. Salt deteriorates the materials of the kayak, weakening the hull and causing all the accessories and mounting hardware to break faster. Washing it away using a good cleansing agent is crucial for maintaining its lifespan.
To scrub down the kayak, you can use a mild detergent of the sort you have lying around your house. Or you can try a more kayak-specific product, such as:
- StarBrite, a special hull cleaner formulated for fiberglass, Kevlar, and plastic hulls
- 303 Marine Boat Wash, a boat-washing product that also works on kayaks. It features an integrated UV protectant
These will help to get rid of any traces of saltwater, mold, grime, and debris.
Step 5: Dry it thoroughly
Let the kayak drip-dry for a few hours in direct sunshine, then bring it indoors and let it air-dry overnight.
But you’re not done yet! The next day, get a clean cloth or towel and give the kayak a thorough drying out. Make sure to wipe away any moisture tucked into any nooks and crannies, especially beneath the seat, inside the cockpit, and in the compartments. Wipe down until the kayak is as dry as you can make it.
Moisture contributes to mold and mildew, so drying the kayak down will help to protect it against these subtle but hard-to-eliminate causes of damage.
Step 6: Cover it
Once you’ve mounted the kayak onto your rack—be it a wall mount, ceiling storage rack, kayak hoist, freestanding rack, or vertical storage rack—make sure to close the hatches and cover up the cockpit.
Now you’re done and can walk away trusting your kayak will hold up for another winter spent in storage!
Smart Tips to Stop Thieves From Stealing Your Kayak
Your garage is likely the most vulnerable part of your home, the place most likely to be hit by burglars or thieves looking for something to steal. It’s not uncommon for thieves to make off with kayaks and other easily re-sold items (lawnmowers, power tools, etc.).
Thankfully, there are a few simple precautions you can take to ensure your kayaks are secured against theft:
- Keep your garage door closed. Leaving your garage door open is convenient for you, but also for thieves. Always make sure your garage door is closed—even if you’re just running out on a quick errand or popping to the corner store. That’s usually enough of a deterrent to keep casual thieves out.
- Lock it down. One of the simplest theft prevention methods is simply to lock your kayak. Anchor two bolts in your garage wall, and use them to run a chain over and around the kayaks, secured with a heavy-duty padlock. It’s not entirely theft-proof—the chain and bolt can be cut using a bolt-cutter—but even that one additional layer of defense is often enough to dissuade thieves who are looking for an “easy” score.
- Install a home security system. You can stick with just motion-activated lights (a useful deterrent at night), add a doorbell camera, or go for a full-on smart home monitoring system. You can even contract out with a security company to provide around-the-clock security and monitoring of your home if you’ve got valuables (including your kayaks) you want to protect.
You’ll find that doing even these few things will likely be more than enough to keep thieves from making off with your kayak.
The majority of home burglaries and break-ins are crimes of opportunity; thieves see a garage or side door open, and slip inside to steal something without any real intent to break into that particular property. It really doesn’t take much to stop “casual” thieves from making off with your kayaks!
Kayak Storage FAQ
Will Cold Damage My Kayak?
Plastic, fiberglass, Kevlar, and the other materials used to build the hull of your kayak are resistant to cold, so you won’t have to worry about the kayak being damaged by cold winters.
However, there are a few exceptions you need to know about:
Extreme cold temperatures (anything below 0F) can make the plastic stiffer and more brittle, which in turn makes them more likely to be damaged. If you live in an area where you experience periods of extreme cold, consider installing a heating system in your garage to keep the kayaks from getting too cold.
Humidity is a very real problem in winter, when you drive your snow-and-ice-caked tires into the garage. All of this humidity can accumulate on and inside your kayak, increasing the risk of damage from mold or mildew. If your garage tends to get very wet over the winter, make sure your kayak’s hatches are closed to keep moisture from accumulating inside the compartments, and cover the cockpit with a tarp to block moisture from building up there.
Will Heat and Humidity Damage My Kayak?
Heat itself isn’t going to be damaging to most kayaks. Fiberglass, Kevlar, and plastic can all withstand temperature extremes far higher than the ambient heat in even parts of the country like Texas, Arizona, or Florida. The heat won’t be a threat to your kayaks.
What will be a threat, though, is:
Direct sunlight, which thankfully you can avoid by storing the kayaks inside your garage.
Humidity. Humid climates have a lot of moisture in the air, which can accumulate on and inside your kayak. Together with the heat, this moisture creates a breeding ground for mold and mildew. To protect your kayak against moisture, consider installing a dehumidifier nearby, and make sure to close the compartments and keep the cockpit covered to stop moisture from accumulating on the inside as much as possible.